Intro to Doppler: Building Express Application With Doppler And FaunaDB
Building full-stack Express applications would always involve connecting to a database or external resources that are needed to have functional applications. When connecting to these external resources we would need a means of verifying our identity before making a successful connection. We use special secret keys or API keys that are peculiar to our application to verify our identity. These keys should always be kept secret from the public eye as the Web is an open village or we stand to lose our application to cybersecurity attacks. Managing secret API keys on the backend application has been strenuous and many solutions like using the .env file have been proposed, but these solutions have not been any efficient when deployed to the Web.
Introduction to Doppler Secret Management
Doppler has since its invention made secret management easier by reducing the complexity involved in securing the secret resources needed within our application for it to work. Doppler as a tool integrated into our application helps our application scale as it increases in functionalities providing it with fine-grained access controls, logs, versioning.
Doppler provides a secure and scalable Universal Secrets Manager that makes development for developers easier by removing any need for .env files, or the unnecessary hardcoded secrets and copy-pasted credentials. This Universal Secrets Manager works for almost all the programming languages regardless of their steadily growing list of integrations. Doppler can be integrated into an existing project or your first project by following the self-explanatory docs for installing Doppler. The Doppler CLI tool makes it a whole lot easier to access the secrets in any environment, either the development environment or production. Also, we’re provided with a dashboard to manage our application configurations.
To avoid breaking code in production, Doppler automatically creates a snapshot of our latest secrets and stores it in an encrypted file. During development, if we couldn’t get access to the API that we connect to with the secret keys, the Doppler CLI smartly fallsback to the snapshot from the encrypted file.
Next, let’s start building and implementing the different parts of our backend application. This will involve a series of simple steps to define and then start our server. Let’s create a folder named Doppler project, change directory into this folder, and then at the root of the folder initialize an Express application:
mkdir “Doppler project”
cd Doppler\ project/
npm init -y
Let’s install the dependencies needed within our application to implement some functionalities:
npm install express faunadb
The above command would install the Express library, and the JavaScript Driver, faunadb, for connecting to the database. Click here to set up a Fauna account if you don’t have anyone. In the dashboard, click on the “NEW DATABASE” button, provide a name for your database then press the SAVE button. Once you’ve created your database, you’ll need to create a collection named Posts. This is what we’ll be interacting with within our source code to create a Document (a post) within our application. Now let create our /server.js file, and update it with the following code to implement a server for our application:
const express = require(“express”);
const faunadb = require(“faunadb”),
const q = faunadb.query;
const secret = process.env.FAUNADB_SERVER_SECRET;
const client = new faunadb.Client({
secret: secret,
});
const app = express();
app.use(express.json());
const PORT = process.env.PORT || 8000;
app.listen(PORT, () => console.log(`🚀🚀 Server listening at port ${PORT} 🚀🚀🚀`));
Now let’s define the different routes that would connect our backend application to the database and perform CRUD actions on it when we send requests to the server.
...
app.post('/posts', async (req, res) => {
try {
const {post, description } = req.body;
const { data } = await client.query(
q.Create(q.Collection('Posts'), { data: { post, description } })
);
res.status(201).json(data);
} catch (error) {
res.status(500).json({error: error.description})
}
});
...
In the above code, we’re creating a post data (Document) in our database when we make a POST request on the /posts path of our application. To test our application routes, we’ll use any HTTPS client, and for this tutorial, we’ll be using the Postman application to test it. Before we start testing our application, let’s implement another route, to get all the Documents (posts) within our application.
...
app.get('/posts', async (req, res) => {
try {
let { data } = await client.query(
q.Map(
q.Paginate(q.Documents(q.Collection("Posts"))),
q.Lambda("X", q.Get(q.Var("X")))
)
)
res.status(200).json(data[0][“data”])
} catch (error) {
res.status(500).json({error: error.description})
}
});
...
Now we’ve implemented the routes for our application, let’s set up Doppler for our project to manage our environment variables, aka secret keys. Let’s create a Doppler account by clicking here. Follow the user-friendly steps to create an account, and once created, go ahead to create a workspace with any name you want.
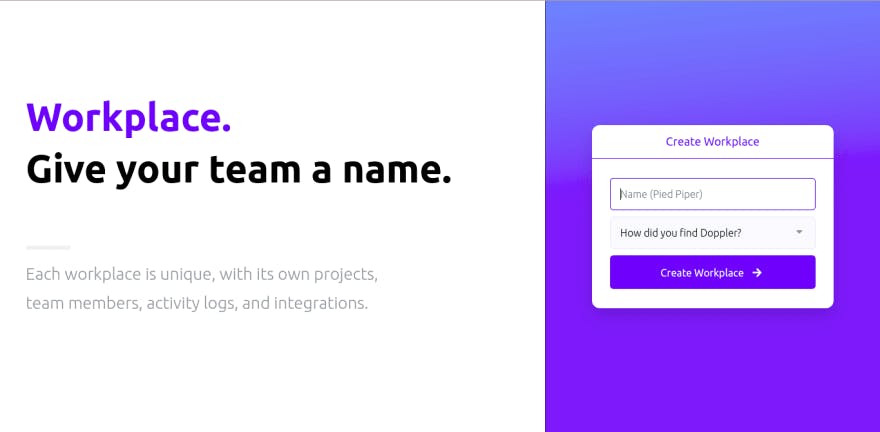
After creating a workspace, follow the Doppler friendly walkthrough to understand some of the functionalities and features of Doppler. Next, let’s create a new project on Doppler. Click on the Project link, then click on the plus icon to create and add a new project to the workspace. We’ll name it Doppler-Express. Once created, we’re provided with three environments for our project namely:
- Development
- Staging
- Production These are environments for managing the secret resources we’ll use within our application.
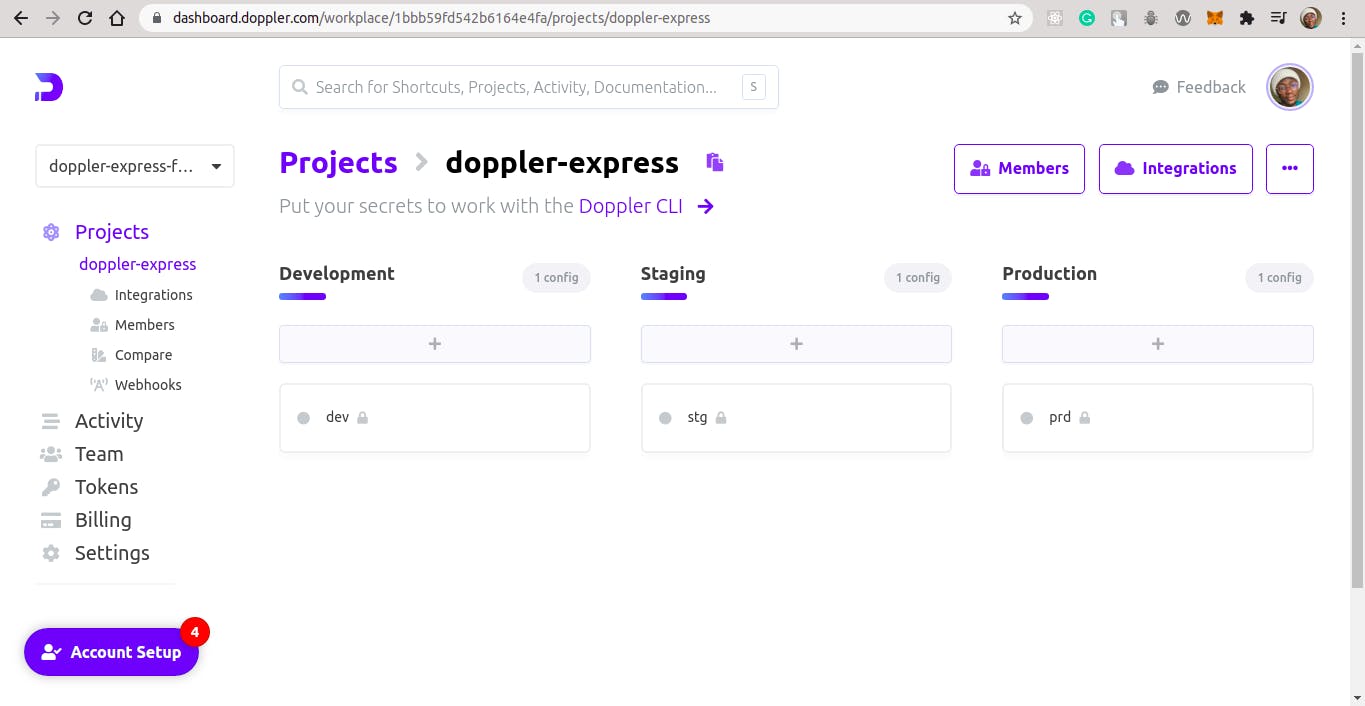
Now we have our project set up on the Doppler website, let setup our local environment on our local machine using the Doppler CLI.
Set Up Doppler On The Local Environment Using The Doppler CLI
Let’s proceed ahead to install the Doppler CLI which will help us in the development stage of our application.
# Install pre-reqs
sudo apt-get update && sudo apt-get install -y apt-transport-https ca-certificates curl gnupg
# Add Doppler's GPG key
curl -sLf --retry 3 --tlsv1.2 --proto "=https" 'https://packages.doppler.com/public/cli/gpg.DE2A7741A397C129.key' | sudo apt-key add -
# Add Doppler's apt repo
echo "deb https://packages.doppler.com/public/cli/deb/debian any-version main" | sudo tee /etc/apt/sources.list.d/doppler-cli.list
# Fetch and install latest doppler cli
sudo apt-get update && sudo apt-get install doppler
Now we’ve finished configuring and installing Doppler CLI on our local machine, run the following code to confirm that it was installed successfully.
doppler  --version
# v3.32.0
Next, let’s authenticate our local development with the remote development environment as they would need to be in sync with each other.
doppler login
? Open the authorization page in your browser? Yes
Your auth code is:
XXXXh_XXXXphone_bus_XXXXo_XXXXville
Waiting...
This opens the browser to log into your account and authenticate your local environment. Fill in your email or login with Google, then copy and paste the auth token that’s displayed on the terminal, to authenticate Doppler. Inside the root, run the doppler setup command and select the right option to configure your local environment:
doppler setup
? Select a project: doppler-express
? Select a config: dev
┌─────────┬─────────────────┬─────────────────────────────────────────────────┐
│ NAME    │ VALUE           │ SCOPE                                           │
├─────────┼─────────────────┼─────────────────────────────────────────────────┤
│ config  │ dev             │ /home/ikehakinyemi/Projects/NodeJS/Doppler proj │
│         │                 │ ect                                             │
│ project │ doppler-express │ /home/ikehakinyemi/Projects/NodeJS/Doppler proj │
│         │                 │ ect                                             │
└─────────┴─────────────────┴─────────────────────────────────────────────────┘
Now let’s return back to our remote project on the website and click on the dev section of the project. Then click on the Add Secret to add a new secret as below:
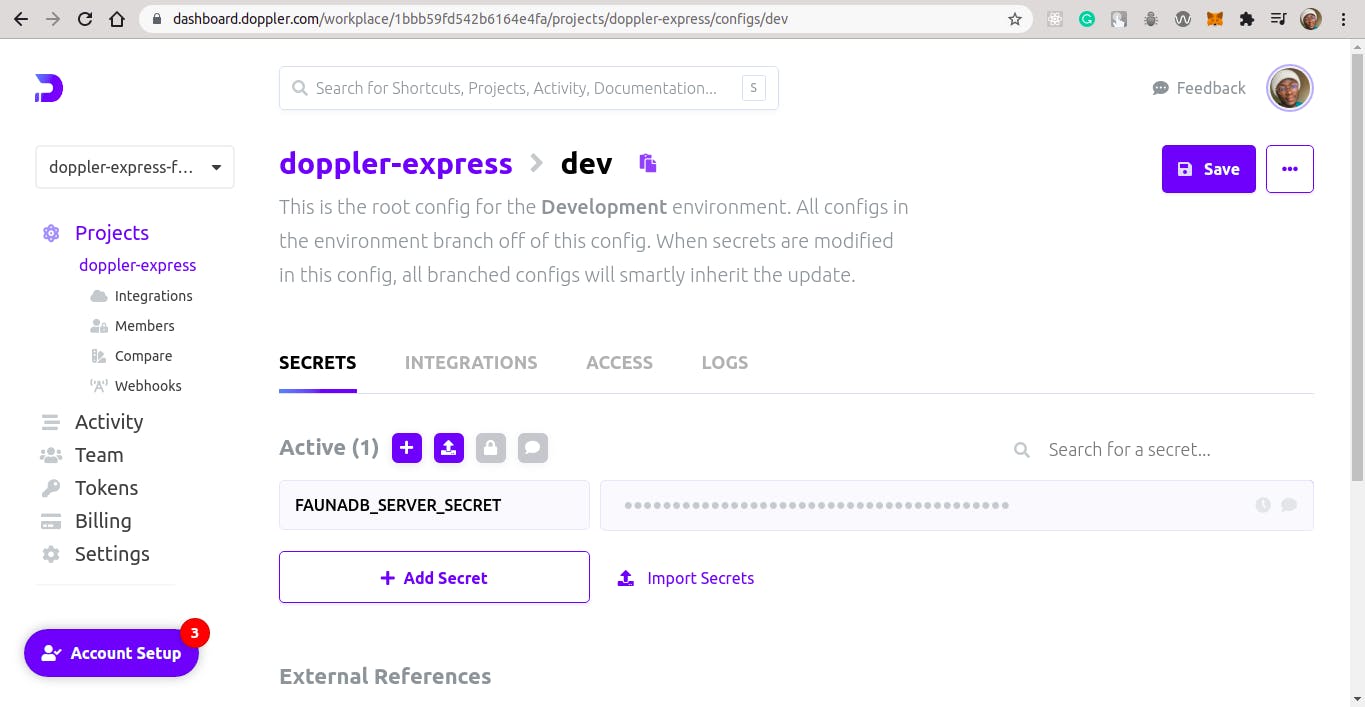
Add the name of your secret key and paste in the value of the secret key, which is the secret key itself. Click on the Save button to add the secret key to the dev environment. Return back to your terminal and run the following command to confirm that your secret key is in sync with your remote environment:
echo $(doppler secrets get FAUNADB_SERVER_SECRET --plain)
fnAEUIdhSoACXXXXXXXX-n6QxpBZXXXXXXXXpkBp
Now let’s use Postman to test our application and make sure our routes are accessing the database:
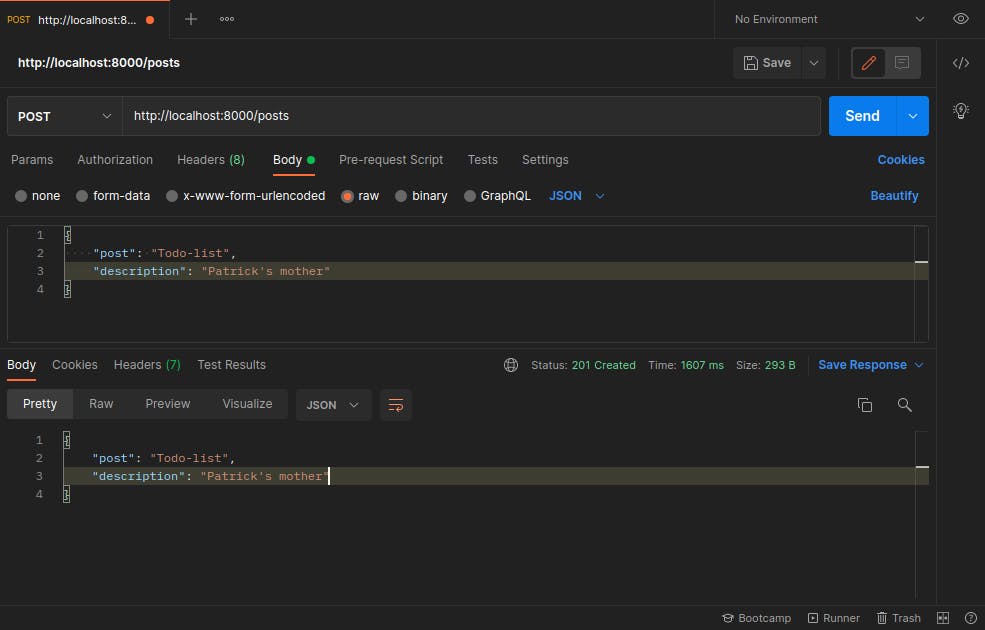
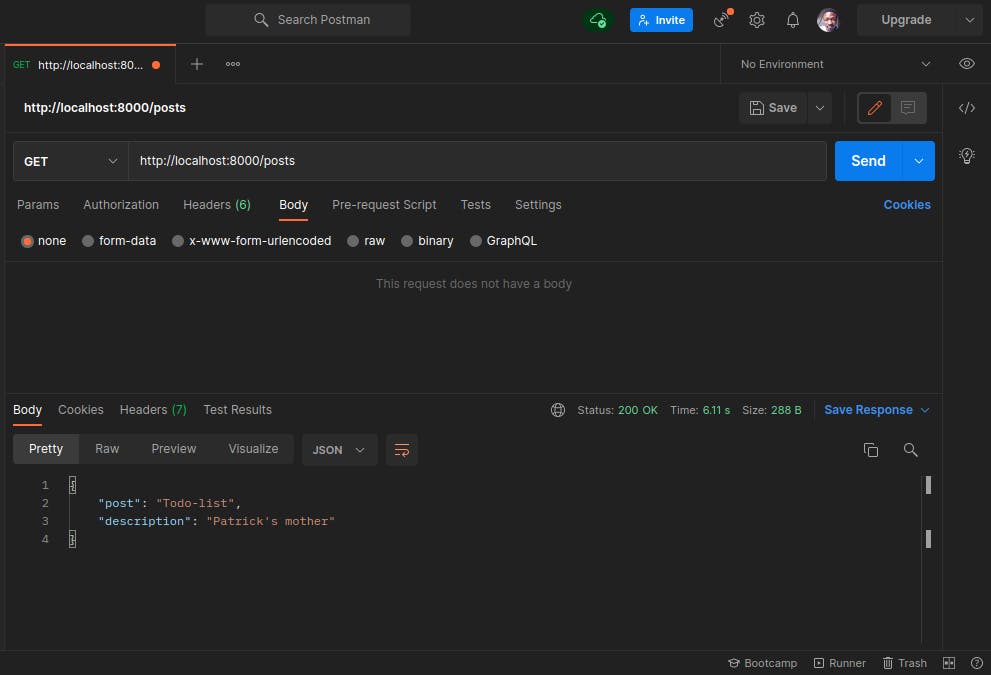
The first Document has been successfully been created on the database. Log into your database and confirm it. Next, let’s check the second route which is a GET request, to return all the Documents from the database as below:
Conclusion
We’ve successfully set up Doppler for an Express application to securely hide and manage our secret keys used for its development. We eliminated the need to have a .env file, and can now easily manage these secret keys among our friends or team by giving them access to the Workspace on the Doppler website. And we can integrate Doppler services in any Node.JS application as it uses the native approach of retrieving the environment variables through the process.env[“YOUR_SECRET_KEY”]. The code used in this tutorial can be found on GitHub.